How to Trade LuxAlgo Indicators on TradingView with AlgoWay
You can connect LuxAlgo indicator signals to AlgoWay through TradingView webhooks without modifying the indicator source code. The essential steps are to select the correct LuxAlgo alert condition, pass the actual Stop Loss and Take Profit price levels, and send separate BUY and SELL instructions to the same AlgoWay webhook.
This guide focuses on LuxAlgo Signals & Overlays using TradingView indicator alerts and a Gate.io connector as a concrete example. Other AlgoWay destinations require their own platform settings.
Last updated: November 4, 2026
How LuxAlgo Signals Reach AlgoWay
LuxAlgo identifies a bullish or bearish condition on your TradingView chart. TradingView sends the alert message to your AlgoWay webhook URL. AlgoWay interprets the instruction, validates the order details, and routes the request to the trading account configured for that webhook.
LuxAlgo indicator signal >> TradingView alert >> AlgoWay webhook >> connected trading platform.
This is an indicator workflow. It does not require TradingView strategy-only fields such as {{strategy.order.action}} or {{strategy.order.contracts}}. For distinct entry directions, use two separate alert conditions.
1. Enable Signals and TP/SL Levels in LuxAlgo
- Add LuxAlgo Signals & Overlays to your TradingView chart.
- Open its settings and enable the Confirmation Signals used for entries.
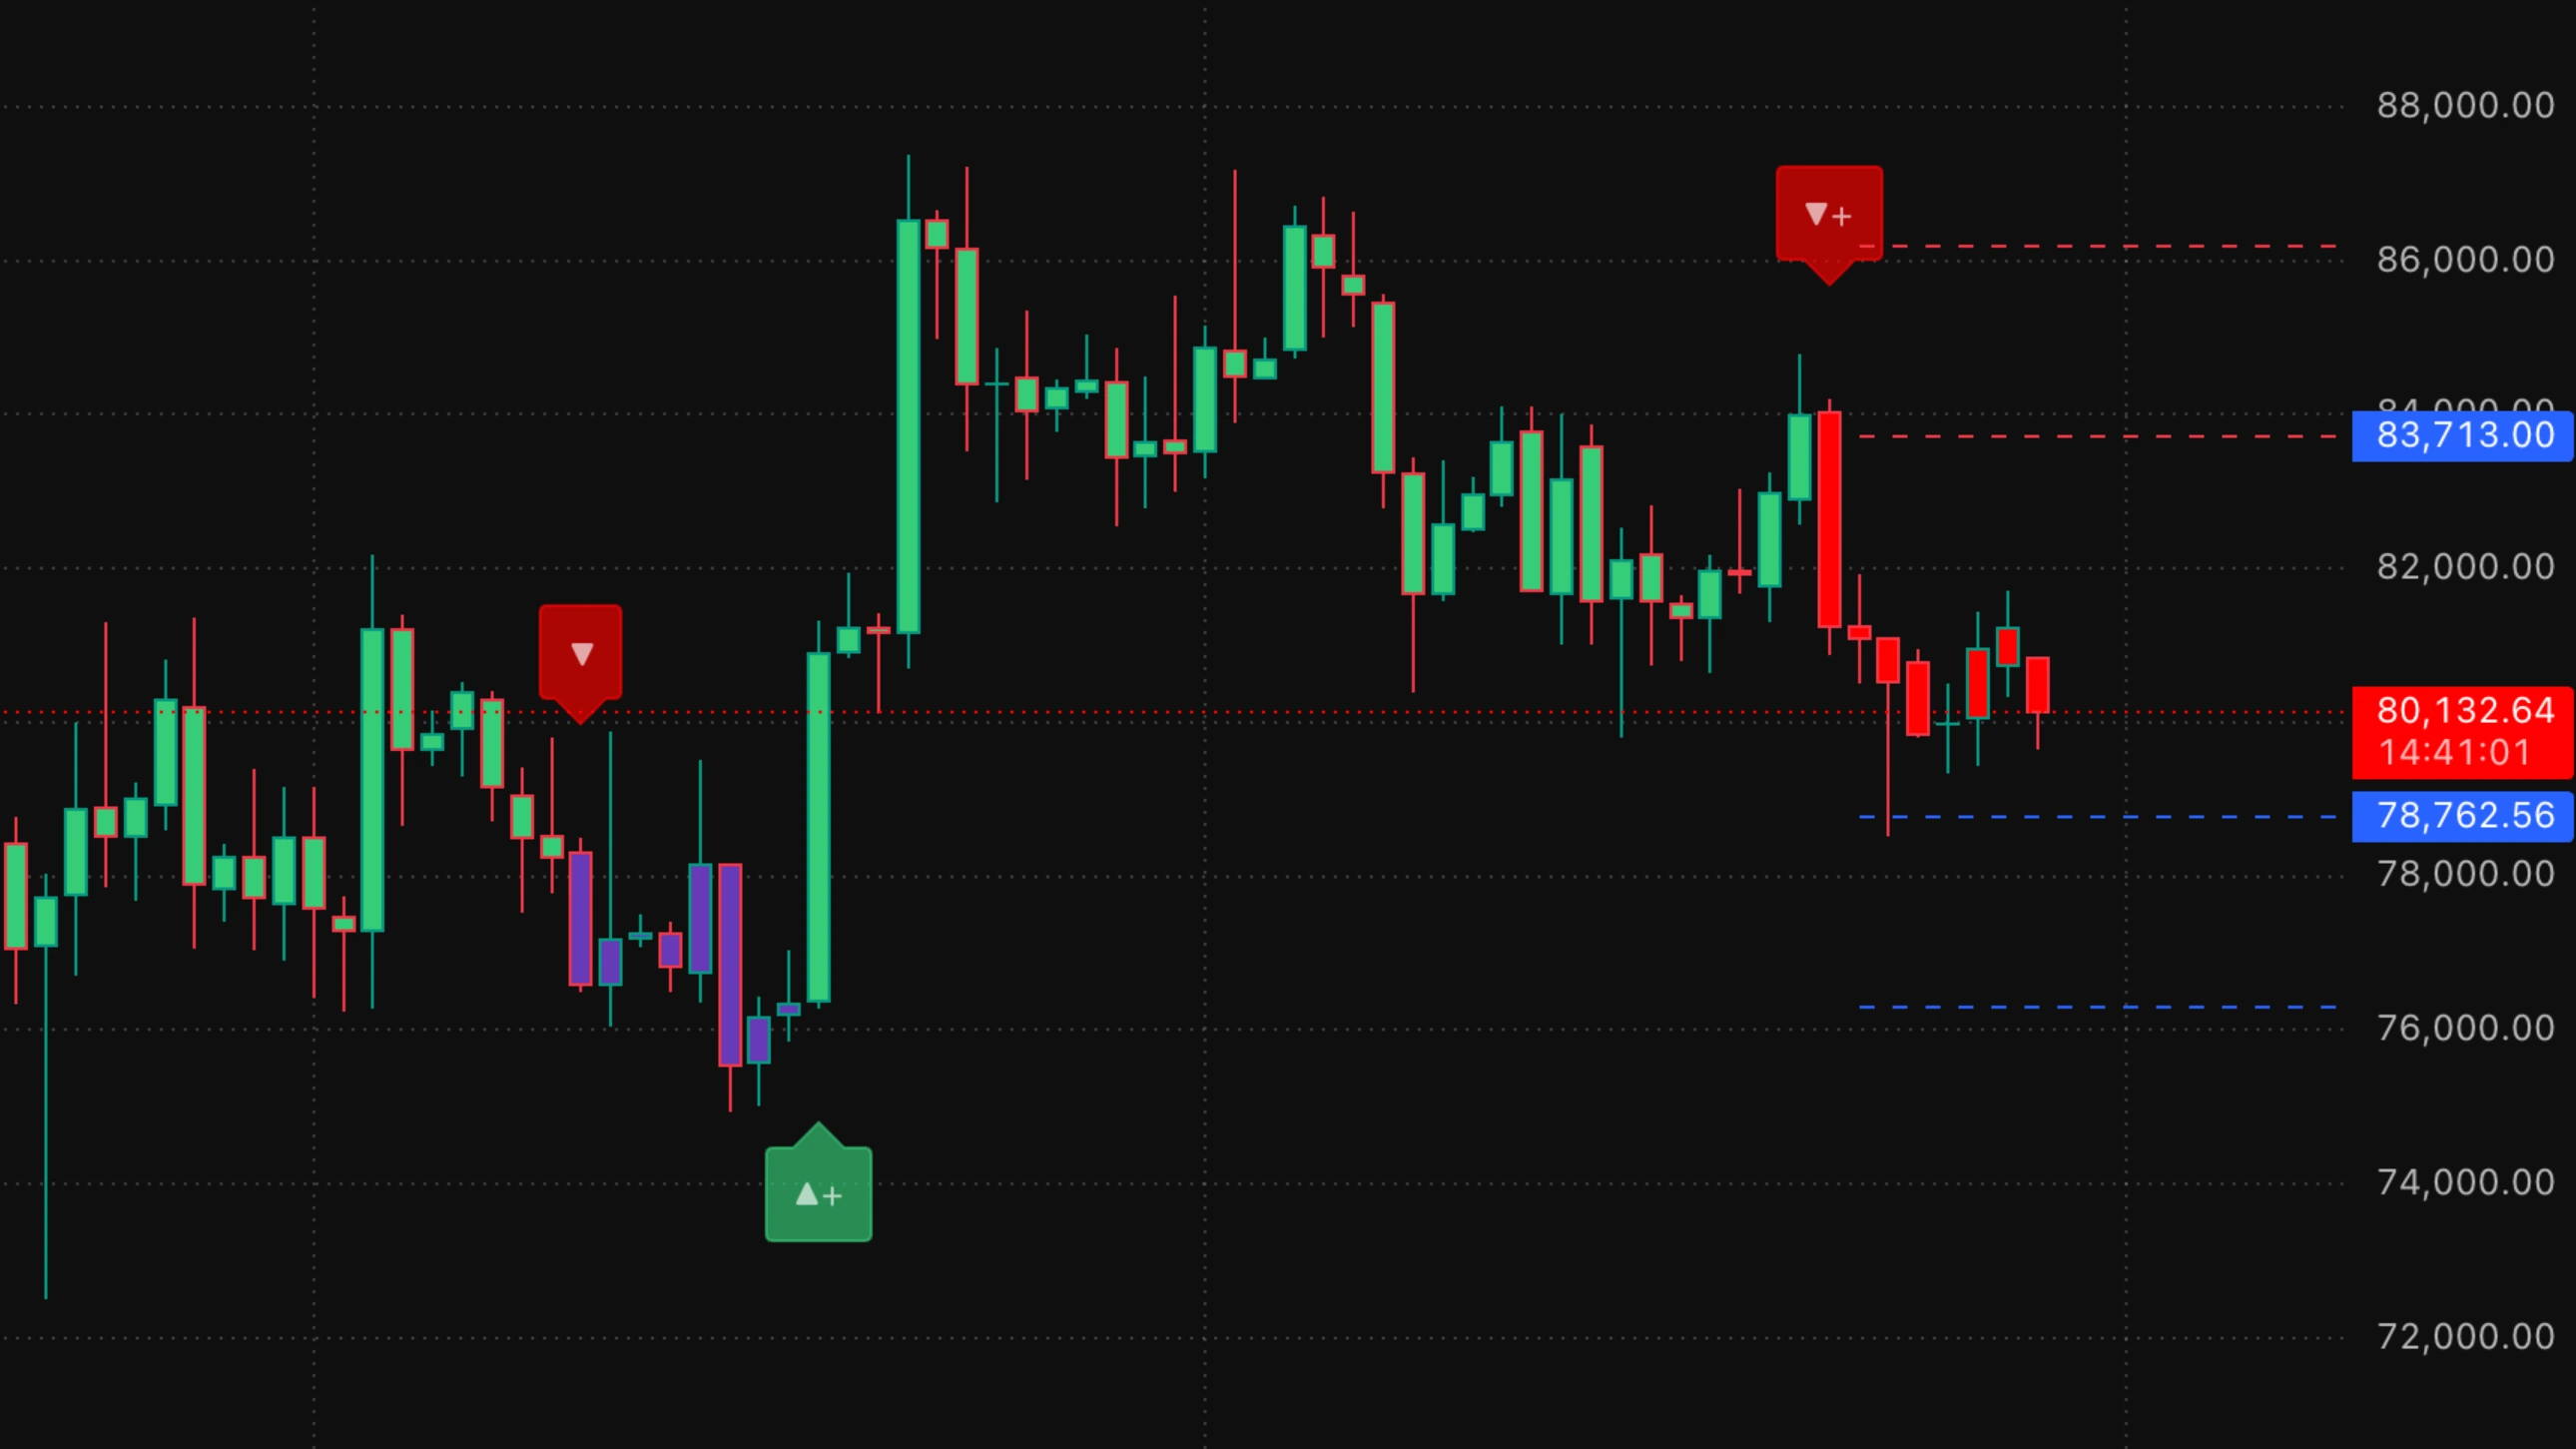
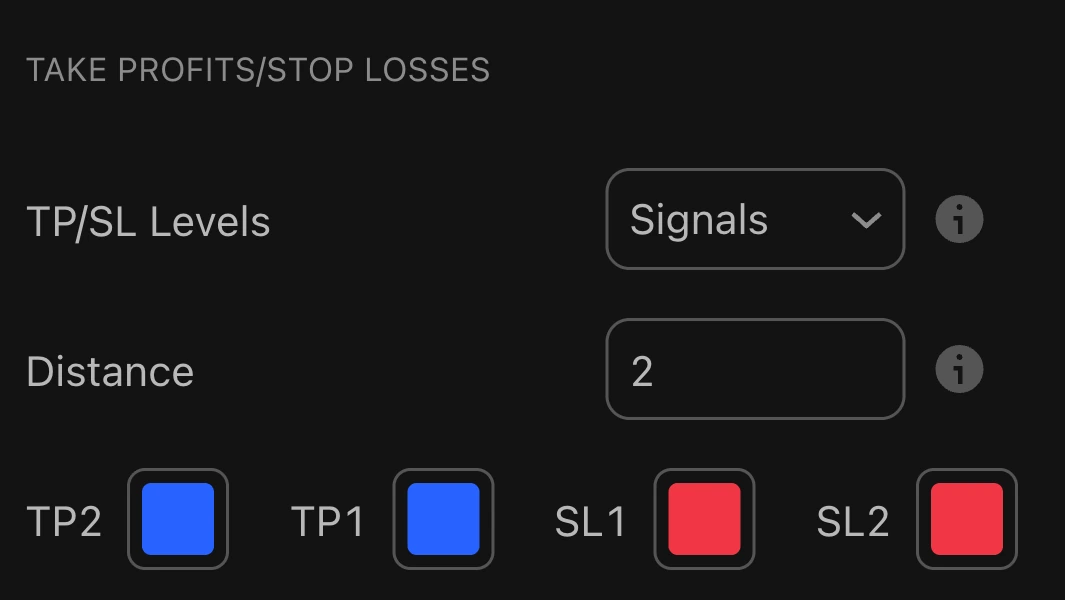
- Under take-profit/stop-loss settings, set TP/SL Levels to Signals. LuxAlgo will calculate fresh levels when a Confirmation or Contrarian signal is generated.
- Create an AlgoWay webhook for your trading destination, configure the connected account, and copy its webhook URL.
- In TradingView, create separate alerts for Any Bullish Confirmation and Any Bearish Confirmation. Both alerts use the same AlgoWay webhook URL in the Notifications tab.
The exact condition names available in the alert menu depend on the specific LuxAlgo tool. Do not apply these messages to a different LuxAlgo indicator without first checking its available plots and alert conditions.
2. BUY Alert: Plain-Text Message for AlgoWay
Select LuxAlgo Signals & Overlays > Any Bullish Confirmation. In the alert's Message field, paste the following text:
platform_name: gateio
ticker: {{ticker}}
order_action: buy
order_contracts: 100
order_size_type: balance_percent
order_type: market
sl_price: {{plot("Stop Loss")}}
tp_price: {{plot("Take Profit")}}
Copy this as plain text, not as a JSON object. Do not add opening or closing braces, quotation marks around the entire message, or quotation marks around the values. Keep the quotation marks inside plot("Stop Loss") and plot("Take Profit") because they are part of TradingView's named-plot syntax.
3. SELL Alert: A Separate TradingView Condition
Now create a second alert and select LuxAlgo Signals & Overlays > Any Bearish Confirmation. Paste this message:
platform_name: gateio
ticker: {{ticker}}
order_action: sell
order_contracts: 100
order_size_type: balance_percent
order_type: market
sl_price: {{plot("Stop Loss")}}
tp_price: {{plot("Take Profit")}}
Both messages go to the same AlgoWay webhook. The fixed order_action value distinguishes the two directions; the bullish alert must not send a SELL command and the bearish alert must not send a BUY command.
order_contracts: 100 together with order_size_type: balance_percent requests a 100% balance allocation. This is included to explain the field mapping, not as a recommended trading size. Reduce the allocation for initial testing and verify the resulting order size before enabling live execution.
4. {{plot("Stop Loss")}} Versus {sl1}: What Is the Difference?
LuxAlgo documents two different placeholder mechanisms. They should not be mixed without checking the alert type.
| Placeholder | Where it is used | Purpose |
|---|---|---|
{{plot("Stop Loss")}} | TradingView alert Message field with the corresponding LuxAlgo plot | Nearest Stop Loss price level |
{{plot("Take Profit")}} | TradingView alert Message field with the corresponding LuxAlgo plot | Nearest Take Profit price level |
{sl1} / {tp1} | LuxAlgo custom message for Any alert() function call | LuxAlgo Stop Loss 1 / Take Profit 1 values |
For the two separate BUY and SELL alerts above, use TradingView's named-plot placeholders. LuxAlgo explicitly documents the plot names Stop Loss and Take Profit in its TP/SL Points guide.
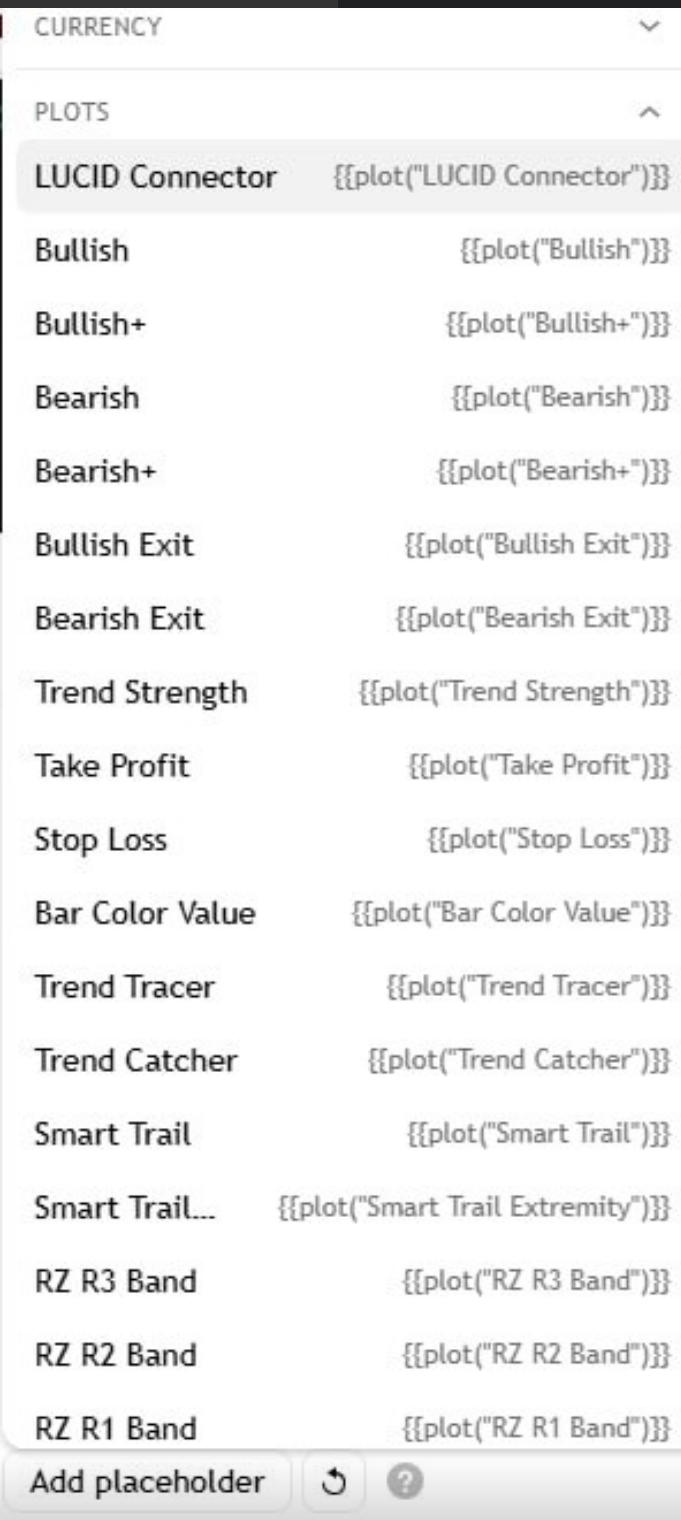
Take Profit and Stop Loss are exposed by your LuxAlgo instance.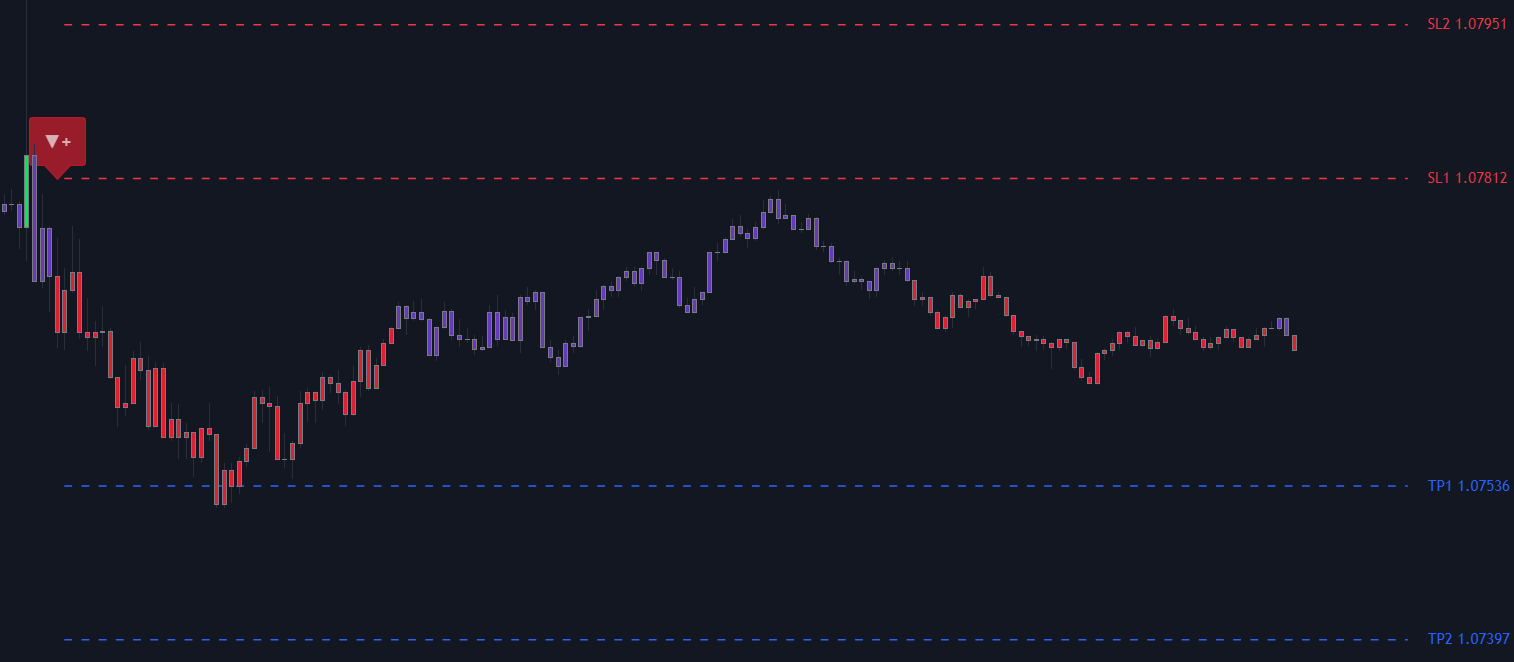
plot placeholders retrieve the nearest available levels. Image: LuxAlgo Docs - TP/SL Points.The Any alert() function call workflow is different: its custom message is configured in the LuxAlgo indicator settings, and its output is shared by the selected conditions. One fixed BUY message cannot safely represent both bullish and bearish signals. Its {sl1} and {tp1} variables are not interchangeable with TradingView's {{plot(...)}} syntax.
5. Alternative: One LuxAlgo Any alert() Function Call
LuxAlgo Signals & Overlays also supports a single Any alert() function call alert. Unlike the two independent TradingView alerts shown above, this method uses one message configured in the Inputs tab of the LuxAlgo indicator itself. LuxAlgo replaces its own placeholders such as {default}, {ticker}, {close}, {sl1} and {tp1} before TradingView sends the webhook.
Choose one method, not both: keep either the two separate BUY/SELL alerts or this single all-in-one alert. Running both for the same signals can submit duplicate orders.
Step 1. Select Only the Entry Signals
Open LuxAlgo Signals & Overlays > Settings > Inputs and find ANY ALERT() FUNCTION CALL CONDITIONS. Enable only Bullish Confirmation and Bearish Confirmation. Keep Bullish+, Bearish+, Contrarian signals, Exit, Take Profit and Stop Loss conditions disabled unless you have explicitly configured and tested separate handling for them. For entry-based SL/TP prices, select TP/SL Levels: Signals.
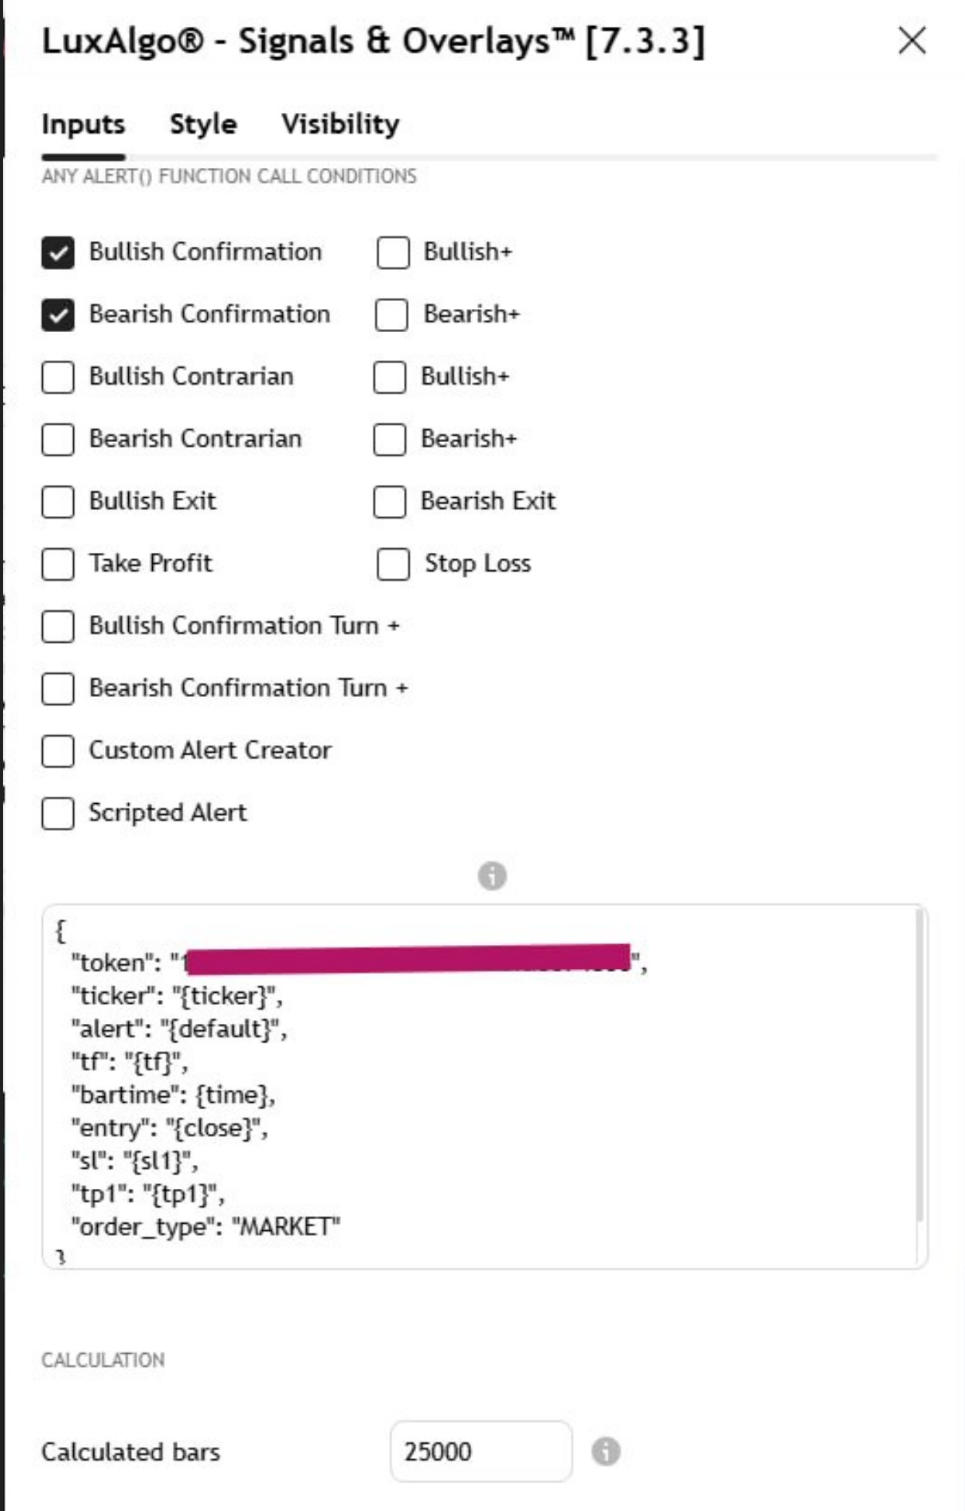
Any alert() function call.Step 2. Set the LuxAlgo Custom Message
For a Gate.io webhook, the all-in-one message follows this structure. Paste it into the custom message field inside LuxAlgo Inputs, not into the separate BUY and SELL TradingView alert messages:
{
  "platform_name": "gateio",
  "ticker": "{ticker}",
  "alert": "{default}",
  "order_contracts": 1,
  "order_size_type": "balance_percent",
  "order_type": "market",
  "price": {close},
  "sl_price": {sl1},
  "tp_price": {tp1}
}
Here order_contracts: 1 with balance_percent represents 1% balance allocation for an initial test. The values of {close}, {sl1} and {tp1} are intentionally unquoted so they can become numbers in the resulting JSON. In contrast, {ticker} and {default} must remain quoted as strings. No separate token field is needed: AlgoWay identifies the destination using its webhook URL.
The message intentionally uses alert: "{default}" instead of a fixed order_action, because the same alert must distinguish bullish and bearish events. LuxAlgo's default message identifies the triggered condition; it does not directly produce AlgoWay's buy or sell values.
alert values and maps them to order_action. In particular, Bullish Confirmation must map to buy and Bearish Confirmation to sell; the default label may also include the word Signal. If this mapping has not been verified on your webhook, use the two separate BUY/SELL alerts instead. Do not rely on AI normalization to guess a trade direction.
Step 3. Create One TradingView Alert
In TradingView, create an alert whose Condition is LuxAlgo Signals & Overlays > Any alert() function call. In Notifications, enable Webhook URL and enter your existing AlgoWay webhook URL. The message comes from the LuxAlgo custom message field in the indicator Inputs. Do not paste the separate BUY or SELL templates into this all-in-one alert. TradingView normally triggers this condition once per bar close.
Test one bullish and one bearish signal, and confirm the resulting AlgoWay webhook logs contain an unambiguous order_action, a numeric price, and valid numeric sl_price and tp_price. Until both directions are verified, do not use this alternative for live execution.
LuxAlgo's official reference: Any alert() function call conditions, placeholders, and JSON formatting.
6. Verify the Incoming Message Before Trading
AlgoWay supports AI-assisted normalization of non-JSON alert text into its trading fields, including ticker, order_action, order_contracts, sl_price, and tp_price. This is a fallback, not a guarantee that every free-form message will be accepted.
The source indicator still has to provide real numeric prices. A normalizer can restructure a message, but it cannot recover an SL/TP price that TradingView failed to substitute. For absolute levels, the AlgoWay keys are sl_price and tp_price; they are not percentage or point distances.
- Confirm that the chosen alert condition actually fires and sends a webhook request.
- Inspect the received message in your AlgoWay Webhook Logs. Check that the ticker, BUY/SELL action, requested balance percentage and both SL/TP prices are present and numeric.
- Verify that BUY Stop Loss is below entry and Take Profit is above entry, and that SELL uses the opposite arrangement. Do not submit live orders with missing, zero, or clearly incorrect prices.
- Start with the smallest safe order size permitted by your connected platform and confirm the execution details before scaling up.
If {{plot("Stop Loss")}} or {{plot("Take Profit")}} is still visible literally in the received alert, or the values are empty, stop there. Verify that the correct LuxAlgo indicator is selected in the alert and that its TP/SL plots are accessible. AI normalization cannot invent the missing price level.
Frequently Asked Questions
Do I need the LuxAlgo Pine Script source code?
No. Named TradingView plots and the built-in LuxAlgo indicator alert conditions can be used without editing the indicator source.
Why do I need two alerts?
The entry action is fixed in each message: buy for bullish confirmation and sell for bearish confirmation. Separate conditions keep the direction unambiguous.
Should I use {sl1} and {tp1}?
Use {sl1} and {tp1} only in the LuxAlgo Any alert() function call custom-message mechanism, after verifying that AlgoWay maps the incoming LuxAlgo signal label to a trading action. For the two-alert method, use the documented TradingView {{plot("Stop Loss")}} and {{plot("Take Profit")}} placeholders instead.
What if my LuxAlgo tool has no Stop Loss or Take Profit plot?
Do not substitute arbitrary names or numbers. Check which LuxAlgo product and alert condition you use, and inspect the actual values sent by TradingView before placing an automated order.
Does this automatically make a strategy profitable?
No. This guide concerns message delivery and order routing, not the quality of a trading signal. Risk settings, exchange rules, execution, slippage and available margin still matter.
Official References and Further Reading
- LuxAlgo: TP/SL Points and named plot placeholders
- LuxAlgo: alert conditions and Any alert() function call
- TradingView: using variable values in alerts
- AlgoWay webhook message validation guide
Bottom line: use two separate LuxAlgo indicator alerts, send their messages to the same AlgoWay webhook, and confirm the real numeric TP/SL values in logs before live trading. The message format is simple; correct alert conditions and verified data make it usable.